
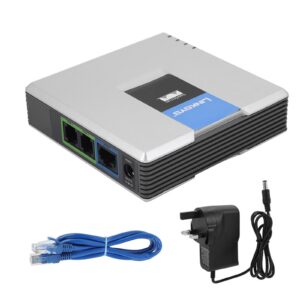
The Linksys PAP2T is one of the most popular analogue telephone adapters (ATAs) ever made, allowing you to connect a standard analogue telephone to a modern VoIP service. Although it’s now a legacy device, it still delivers excellent call quality and is an ideal choice if you already own one.
This guide shows you how to configure a Linksys PAP2T for use with Plexatalk. It should also work for the Linksys PAP2, SPA1001, SPA2100, SPA2102, SPA3000 and SPA3102, as they all use very similar firmware. The Cisco SPA112 also shares many of the same settings, although some menu names and layouts differ slightly.
Important
The Linksys PAP2T is a discontinued product that only supports SIP over UDP. It does not support SIP over TCP or SIP over TLS, meaning it cannot be used with providers that require encrypted SIP signalling. This may be a problem if you can’t disable SIP ALG on your router and have it enabled.
As these devices have been out of production for many years, most available today are used, refurbished or old stock. Unfortunately, counterfeit units also exist, so we recommend purchasing from a reputable supplier.
This guide assumes the adapter has been reset to its factory defaults.
You’ll also need the following information from Plexatalk:
Before you can configure the PAP2T, you’ll need to access its web interface.
****
110#
Make a note of the IP address.
Open a web browser on a computer connected to the same network as the PAP2T.
Enter the IP address into the address bar, for example:
http://192.168.1.25
If prompted, enter the administrator password.
(Some PAP2T adapters do not have a password configured by default.)
If you see Admin Login in the top-right corner, click it.
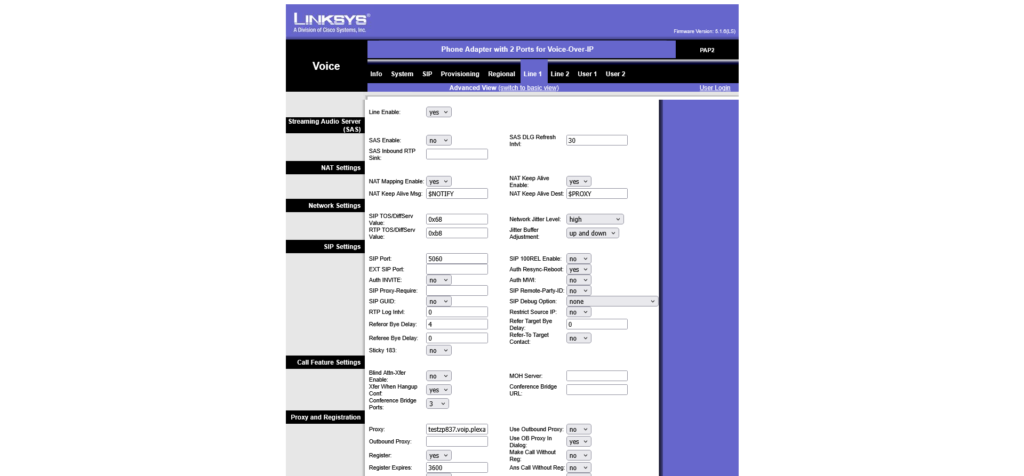
Next, click Advanced View.
You should now see additional tabs including SIP, Regional, Line 1 and Line 2.
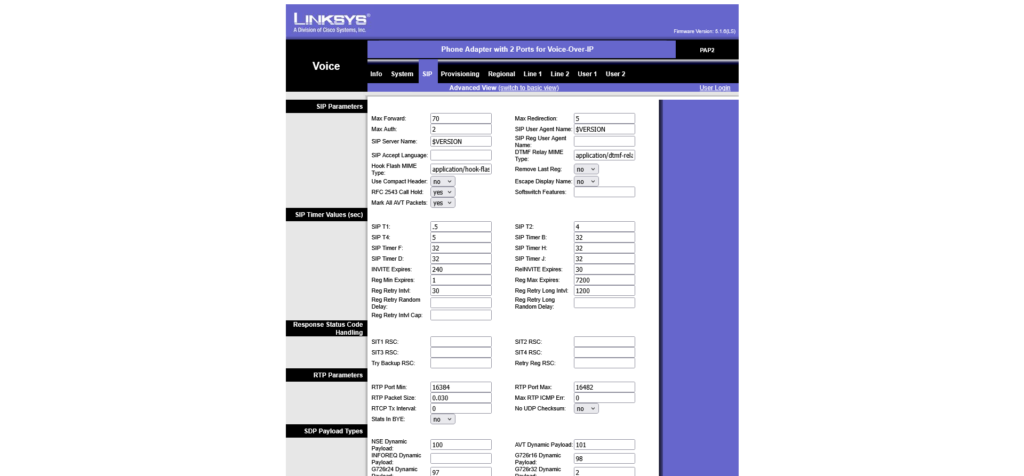
Select the SIP tab.
Change the following settings from No to Yes.
| Setting | Value |
|---|---|
| Handle VIA received | Yes |
| Handle VIA rport | Yes |
| Insert VIA received | Yes |
| Insert VIA rport | Yes |
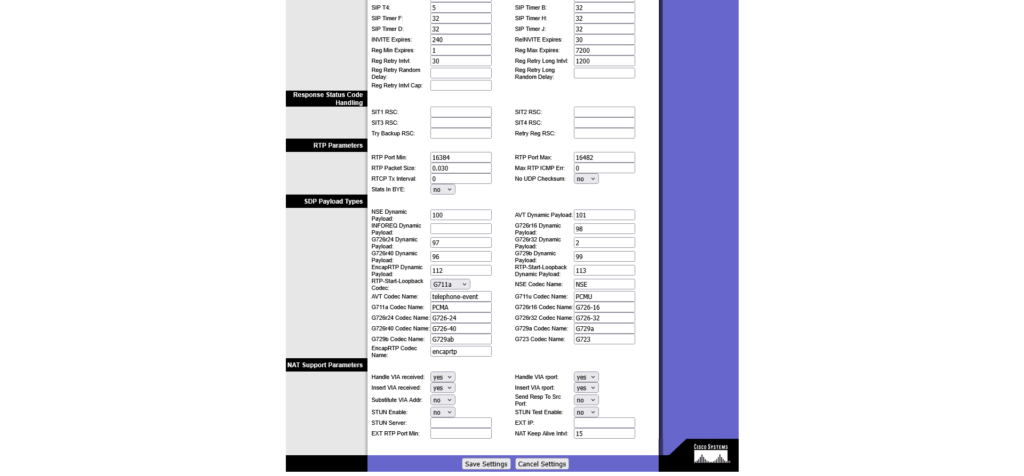
While you’re still on this page, locate the codec settings and change the preferred codec from G711u to G711a.
G.711 A-law is the standard codec used across the UK and Europe and provides the best compatibility and call quality with Plexatalk.
Click Save Settings.
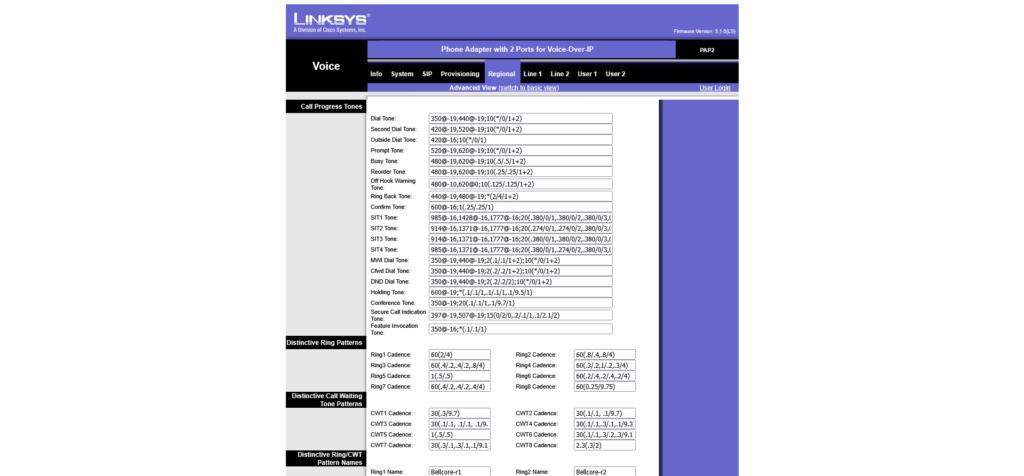
The PAP2T defaults to North American telephone tones like the screenshot above. To make it sound like a standard UK telephone line, click the Regional tab and update the following settings.
| Setting | UK Value |
|---|---|
| Dial Tone | 350@-19,440@-19;30(*/0/1+2) |
| Second Dial Tone | 420@-19,520@-19;30(*/0/1+2) |
| Outside Dial Tone | 420@-16;10(*/0/1) |
| Prompt Tone | 520@-19,620@-19;10(*/0/1+2) |
| Busy Tone | 400@-20;10(.375/.375/1) |
| Reorder Tone | 400@-19;20(*/0/1) |
| Ring Back Tone | 400@-20,450@-20;*(.4/.2/1+2,.4/2/1+2) |
| Confirm Tone | 600@-16;1(.25/.25/1) |
| MWI Dial Tone | 350@-19,440@-19;8(.1/.1/1+2);10(*/0/1+2) |
| Cfwd Dial Tone | 350@-19,440@-22;10(.75/.75/1+2) |
| DND Dial Tone | 350@-19,440@-22;10(.80/.75/1+2) |
| Holding Tone | 600@-19;*(.1/.1/1,.1/.1/1,.1/2.2/1) |
| Conference Tone | 350@-19;20(.1/.1/1,.1/9.7/1) |
| Secure Call Indication Tone | 397@-19,507@-19;15(0/2/0,.2/.1/1,.1/2.1/2) |
| Feature Invocation Tone | 350@-16;*(.1/.1/1) |
| SIT1 Tone | 985@-16,1428@-16,1777@-16;20(.380/0/1,.380/0/2,.380/0/3,0/4/0) |
| SIT2 Tone | 914@-16,1371@-16,1777@-16;20(.274/0/1,.274/0/2,.380/0/3,0/4/0) |
| SIT3 Tone | 914@-16,1371@-16,1777@-16;20(.380/0/1,.380/0/2,.380/0/3,0/4/0) |
| SIT4 Tone | 985@-16,1371@-16,1777@-16;20(.380/0/1,.274/0/2,.380/0/3,0/4/0) |
| Off Hook Warning Tone | 480@-10,620@-16,1400@0,2060@0,2450@0,2600@0;60(.2/0/1,.2/0/2);240(.1/.1/3+4+5+6) |
Change the following setting:
| Setting | Value |
|---|---|
| Caller ID Method | ETSI FSK With PR (UK) |
Click Save Settings.
Click the Line 1 tab.
| Setting | Value |
|---|---|
| NAT Mapping Enable | Yes |
| NAT Keep Alive Enable | Yes |
| Setting | Value |
|---|---|
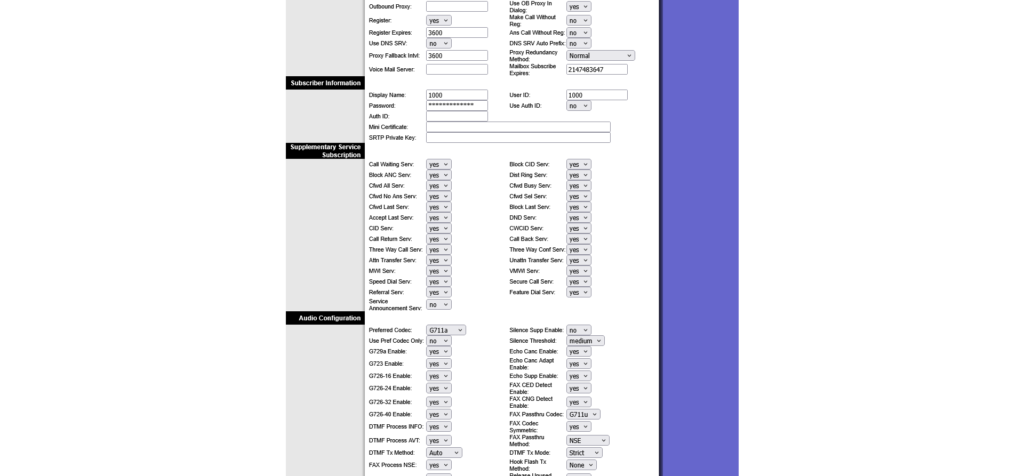
| Proxy | Your Plexatalk SIP server (e.g. testzp837.voip.plexatalk.co.uk) |
| Outbound Proxy | Leave Blank |
| Setting | Value |
|---|---|
| Display Name | Your extension number or telephone number |
| User ID | Your Plexatalk User ID |
| Password | Your Plexatalk SIP Password |
Further down the page, locate the audio codec settings and change:
| Setting | Value |
|---|---|
| Preferred Codec | G711a |
Leave all other Line 1 settings at their default values unless instructed otherwise by Plexatalk.
Click Save Settings.
If you want to use the second telephone port on the PAP2T, click the Line 2 tab and repeat the same configuration using the credentials for your second Plexatalk extension.
If you only need one telephone, you can leave Line 2 unconfigured.
Once you’ve finished configuring the PAP2T, disconnect the power for around 10 seconds before reconnecting it.
Within a minute, the Phone 1 LED should illuminate and the adapter should register with the Plexatalk platform.
You can now make a test outbound call and then call the number back to confirm inbound calls are working correctly.
Check the following:
Reboot the adapter after making any configuration changes.
Dial:
****
110#
again to confirm the IP address hasn’t changed.
Verify that:
If your PAP2T still won’t register after checking your SIP credentials, there are a few additional settings worth checking.
Try using a public DNS server
Some ISP-provided DNS servers can occasionally have difficulty resolving SIP server hostnames quickly or reliably. If you’re using a hostname such as testzp837.voip.plexatalk.co.uk, try configuring a public DNS server on the PAP2T.
Navigate to the System tab and set:
| Setting | Value |
|---|---|
| Primary DNS | 1.1.1.1 |
| Secondary DNS | 1.0.0.1 |
Alternatively, you can use Google’s DNS servers:
| Setting | Value |
|---|---|
| Primary DNS | 8.8.8.8 |
| Secondary DNS | 8.8.4.4 |
Click Save Settings when finished.
An incorrect system clock can also cause unexpected behaviour on some firmware versions.
On the System tab, verify that the time zone is correct and that the adapter is successfully synchronising with an NTP (Network Time Protocol) server.
For UK users, we recommend:
| Setting | Value |
|---|---|
| Time Zone | GMT (or GMT/BST depending on firmware version) |
| NTP Server | pool.ntp.org |
After changing either the DNS or time settings, reboot the PAP2T and allow a minute for it to register.
No. The menus are almost identical on the Linksys PAP2, SPA1001, SPA2100, SPA2102, SPA3000 and SPA3102. The Cisco SPA112 also uses similar settings, although some options appear in different locations.
No. The PAP2T only supports SIP over UDP and cannot register to providers that require SIP over TLS or TCP.
Yes. Simply configure Line 1 and Line 2 using separate Plexatalk extensions.
If you already own one, absolutely. The PAP2T still offers excellent voice quality for standard analogue telephones. However, because it is a discontinued product with no TLS support, we recommend a newer ATA for new installations where long-term support and encrypted SIP are required.
If you can hear the other person but they can’t hear you (or vice versa), the most common cause is SIP ALG (Application Layer Gateway) on your router.
The Linksys PAP2T only supports SIP over UDP, and some routers attempt to “help” VoIP traffic by rewriting SIP packets as they pass through the router. Unfortunately, SIP ALG often causes more problems than it solves, resulting in one-way audio, calls dropping after a few seconds or failed registrations.
If your router allows it, disable SIP ALG and then reboot both the router and the PAP2T. Also ensure NAT Mapping Enable and NAT Keep Alive Enable are both enabled on the PAP2T.
If your router doesn’t provide an option to disable SIP ALG, you may need to use a different router or a newer VoIP adapter that supports SIP over TLS.
Some Three Broadband routers have SIP ALG permanently enabled, with no option to disable it. Because the Linksys PAP2T only supports SIP over UDP, the router may interfere with SIP signalling, causing problems such as:
Registration failures
One-way audio
Calls disconnecting unexpectedly
Intermittent call quality issues
This behaviour varies depending on the generation of Three router you have. Some models work perfectly, while others have a forced SIP ALG implementation that cannot be disabled.
If you’re experiencing these issues on Three Broadband, the easiest solution is usually to use your own third-party router or upgrade to a modern ATA or IP phone that supports SIP over TLS, which is generally unaffected by SIP ALG issues.
Despite being over a decade old, the Linksys PAP2T remains a reliable and capable analogue telephone adapter. With the correct UK regional settings and Plexatalk configuration, it continues to provide excellent voice quality while allowing you to keep using your existing analogue telephones.
If you’re looking for a more modern alternative with ongoing firmware updates and support for SIP over TLS, our team can also recommend newer ATAs and IP phones that work seamlessly with the Plexatalk platform.
Whether you’re working remotely, setting up a new workstation, or simply prefer using a desktop softphone, Zoiper is one of the most popular third-party VoIP applications for making and receiving SIP calls from your computer. Compatible with Windows, macOS, and Linux, it’s widely used with hosted VoIP and cloud PBX providers thanks to its straightforward setup process and broad compatibility.
In this guide, we’ll show you how to connect Zoiper Desktop to your Plexatalk VoIP service, including how to enter your SIP credentials, choose the correct transport protocol, and complete the account registration. We’ve also included troubleshooting steps to help resolve common issues such as registration failures, network connectivity problems, firewall restrictions, and SIP ALG, making this guide useful whether you’re configuring a Plexatalk account or setting up Zoiper with another SIP-based VoIP provider.
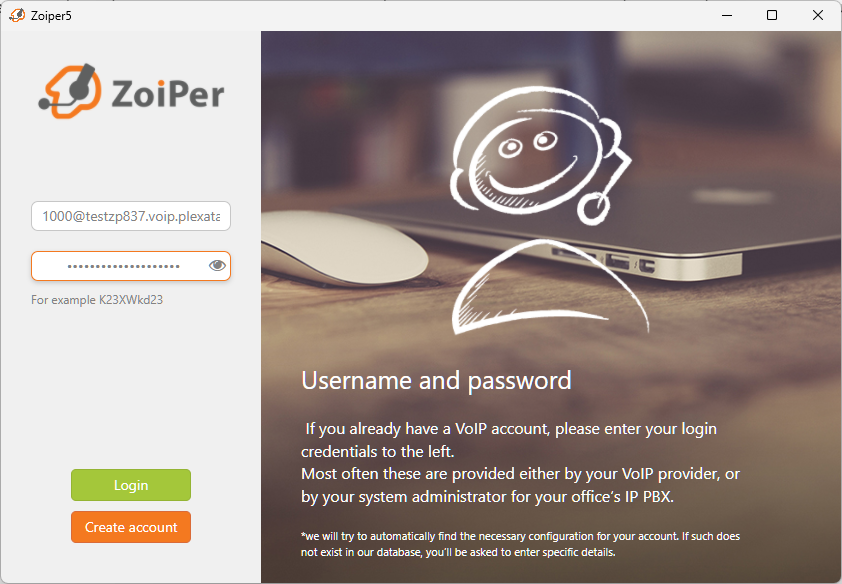
Open Zoiper and choose to add a new account.
Enter the following details:
Once you’ve entered your credentials, click Next.
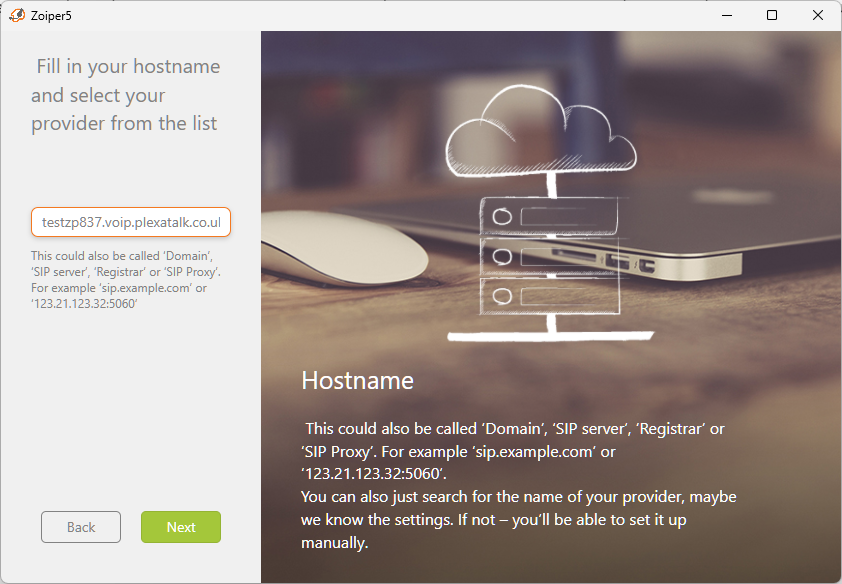
Zoiper will automatically populate the hostname during the setup process.
If the hostname is correct, simply click Next to continue.
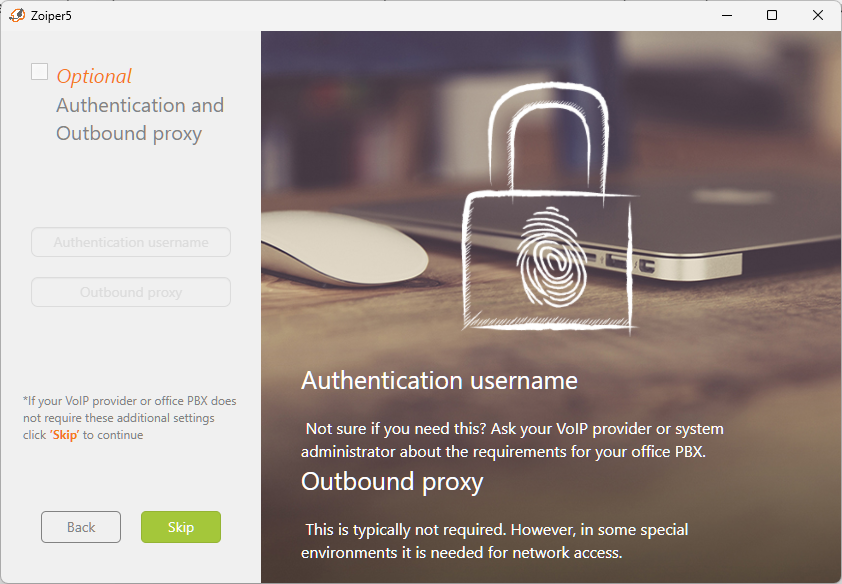
When prompted to configure a proxy server, leave the settings unchanged and click Skip.
No proxy configuration is required for Plexatalk.
Choose the transport type that matches your Plexatalk configuration:
After selecting the transport type, continue with the setup.
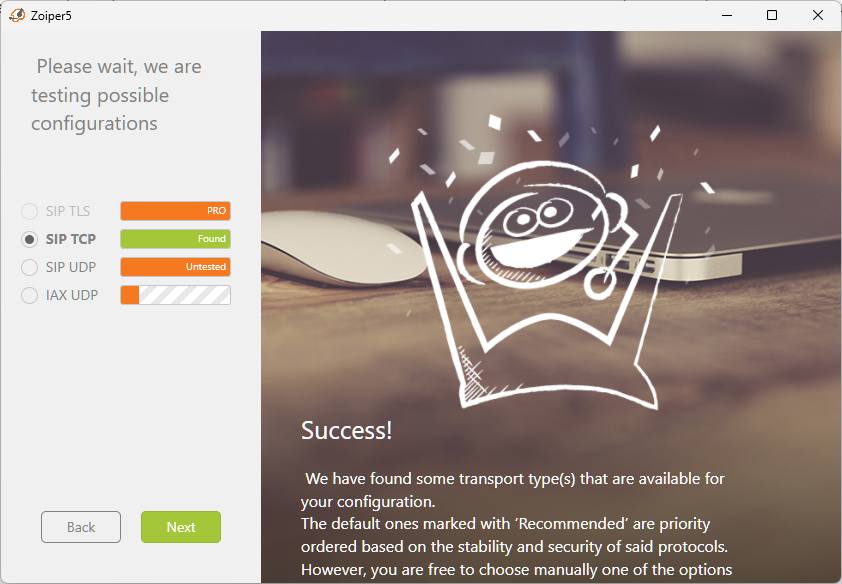
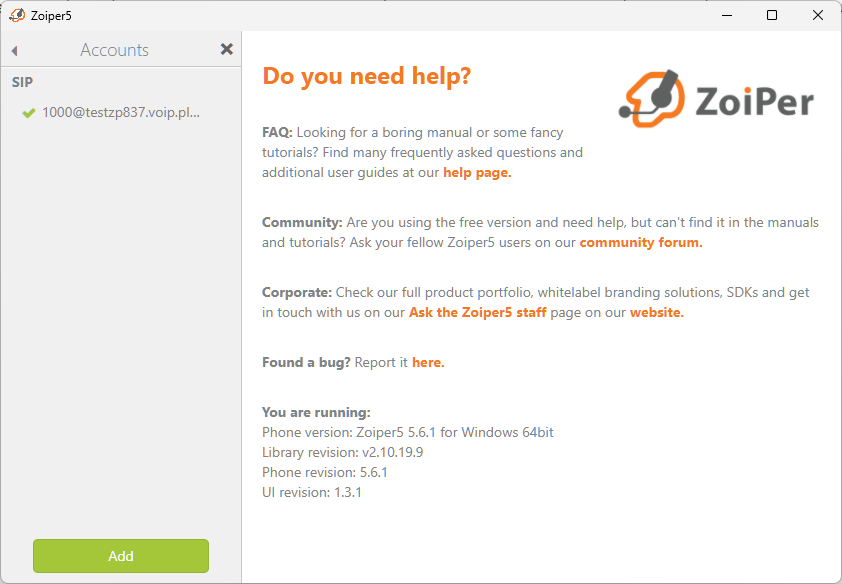
Zoiper will verify your account settings.
If everything has been configured correctly, you’ll see a confirmation screen with a green tick indicating that your account has been successfully added.
Click Finish to complete the setup.
Get Zoiper today from their website
If your account isn’t registering successfully, work through the following checks before contacting support.
The most common cause of registration failures is incorrect account details.
Check that:
Even a small typo or an accidental space can prevent registration.
Ensure you’ve selected the correct SIP transport method.
Plexatalk supports:
If you’re unsure which transport to use, start with UDP unless your administrator has advised otherwise.
If your credentials are correct but registration still fails, confirm your computer can reach the Plexatalk server.
Open a terminal or command prompt and run:
ping your-sip-server.example.com
Replace your-sip-server.example.com with the hostname provided in your Plexatalk account.
Windows
cmd and press Enter.macOS
Linux
If the server responds, your computer can successfully reach the Plexatalk platform. If the request times out or the hostname cannot be resolved, there may be a DNS, firewall, or network connectivity issue.
Note: Some servers intentionally block ICMP (ping) requests for security reasons. A failed ping doesn’t always mean the SIP service is unavailable, but it can be a useful first diagnostic step.
Some security software may prevent Zoiper from connecting to external SIP servers.
Temporarily disable your firewall or antivirus (if appropriate) or ensure Zoiper is allowed through the firewall before testing again.
If you’re on a corporate network, your IT department may also have firewall policies that block SIP traffic.
Many home and business routers include a feature called SIP ALG (Application Layer Gateway).
Although it’s designed to help SIP traffic, it often causes registration failures, one-way audio, dropped calls, or intermittent connectivity issues with hosted VoIP services.
If you’re experiencing any of these symptoms, we recommend checking whether SIP ALG is enabled on your router and disabling it if possible.
If possible, connect your computer to a different internet connection (for example, a mobile hotspot).
If Zoiper registers successfully on another network, the issue is likely related to your original router, firewall, or ISP configuration rather than your Plexatalk account.
After making any changes to your network or account settings, completely close Zoiper and reopen it to ensure it attempts a fresh registration.
If you’ve completed the steps above and Zoiper still won’t register, please get in touch.
To help us diagnose the issue quickly, include:
Providing this information upfront helps us identify and resolve issues much more quickly.
Yes. Zoiper offers a free version that supports the features required for most Plexatalk users. If you need advanced features such as TLS encryption, you’ll need to purchase Zoiper Pro.
Yes. Zoiper Desktop is available for Windows, macOS and Linux, and the setup process is very similar across all three operating systems.
For most users, UDP is recommended.
Some deployments may require TCP, while TLS provides encrypted SIP signalling and is available with Zoiper Pro. If you’re unsure, use the protocol specified by your Plexatalk administrator.
Yes. Zoiper supports secure SIP using TLS, although this feature requires Zoiper Pro. If your Plexatalk deployment has been configured for encrypted signalling, select TLS during setup.
Yes, although this depends on how your Plexatalk extension has been configured. Some extensions can register multiple devices simultaneously. All our home packages come with 5 connections.